A Year Old Kitchen

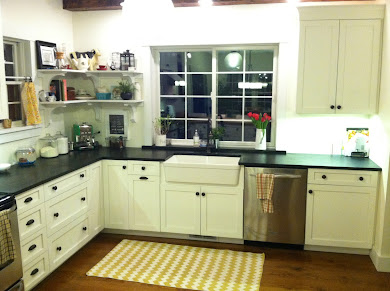
We moved into our new house in October of 2012. Last weekend I finished the kitchen, well at least the first version of it anyway. The hold up to it really being finished was the window sill. Now that, it’s in and trimmed out, I feel good in declaring victory on the kitchen. So we may as well start the tour with a shot of what that looks like now

Finished kitchen soapstone counter tops, soapstone windowsill

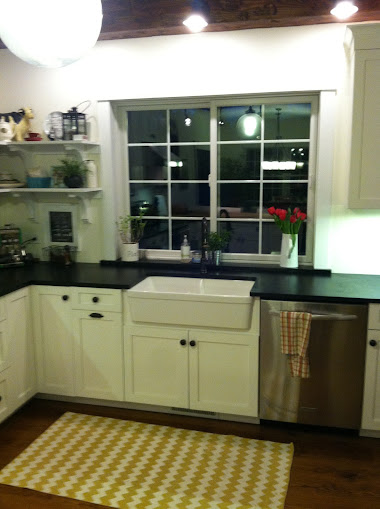
Obviously these pictures were taken at night so they aren’t the greatest, but with 4 kids let’s be honest our kitchen in the day is never this clean. As it is, we still have lots on the countertop, particularly things the kids should not be getting into like eggs from the chicks, our goldfish Annie, etc.

Finished kitchen with soapstone, DIY butcherblock peninsula


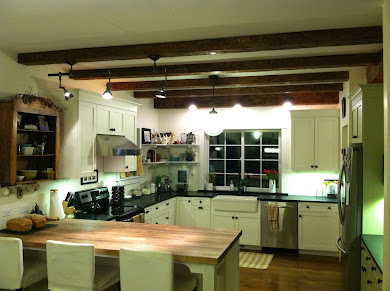
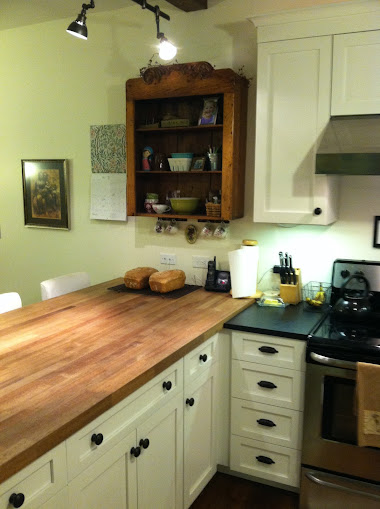
There are so many things about the kitchen that we love it would be tough to pick parts that are favorites. The peninsula with the antique cabinet over it though is particularly great to us. The cabinet came from my parents house. They had found it in one of the barns when they bought their house 30 some odd years ago, and it lived in their kitchen since then. We hadn’t planned on it when we planned the kitchen but my parents happened to be redoing their kitchen as we were finishing the house and we are so glad it worked out just so.

Antique cabinet over butcher block peninsula

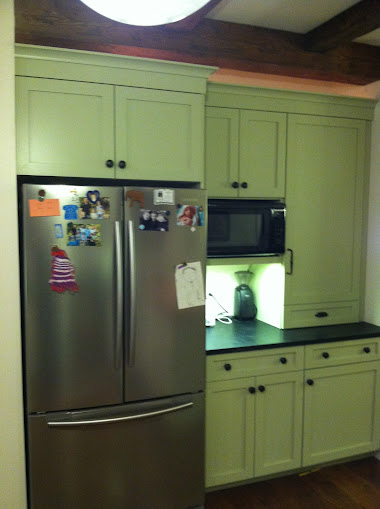
The space under the microwave originally was our coffee and espresso station but the steam was doing a number on the cabinets and it was annoying to access the machines.

Green pantry and fridge cabinets

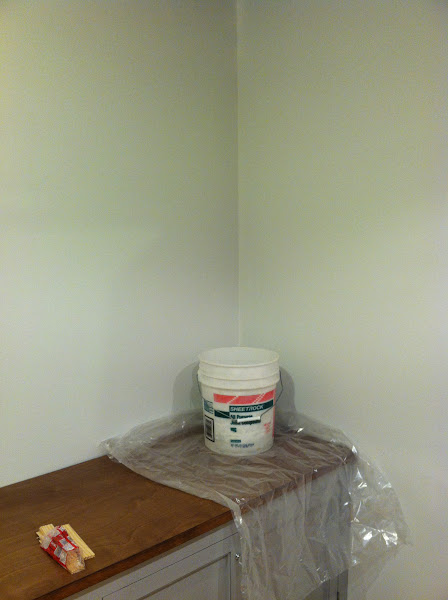
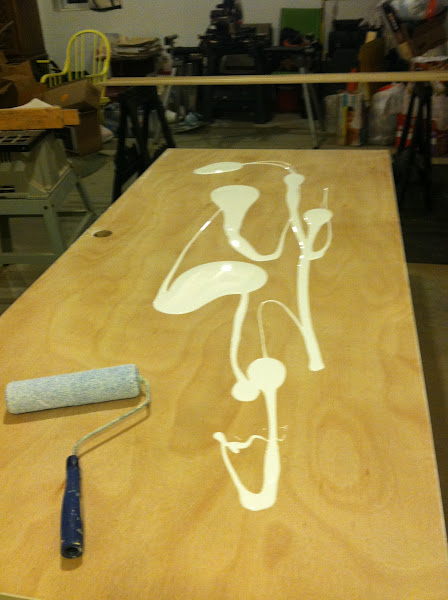
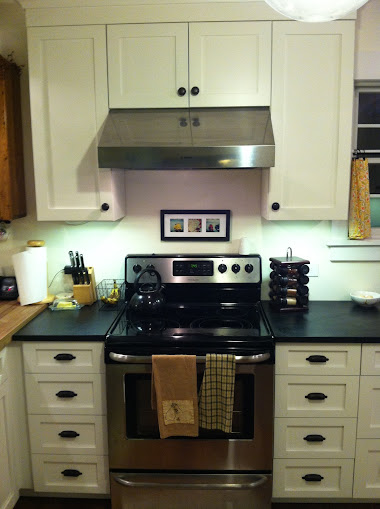
And now I’m realizing that I probably spoke too soon on the finished part as we come to the backsplash part. We knew we didn’t want a big backsplash or anything permanent but we’ve always talked about doing something on plywood that we could change or swap out easily for behind the stove. So far though the wall and paint have held up very nicely though.

Symmetrical cabinets on either side of the stove


Our kitchen plan could not have come together without the good folks over on gardenweb’s kitchen forum. There are many posts, both long before we started and some mildly panicked ones during the build that so many people helpfully chimed in on. Not to mention the countless questions that were answered without me even having to post. I also gleaned many of the ideas for the peninsula, the beams, the windowsill, the stove layout from other’s designs and finished photos.

2013 :: The List

I don’t do resolutions, but lists? Oh yes, I do lists. The goal of this list is like any other that I’m posting here, a reminder to me of what we’ve planned out for the house and a motivator to actually accomplish those things in a reasonable time frame. I have been reading some blogs end of year wrap ups and have really enjoyed their end of year comparisons to beginning of the year plans. I know that much of what I’m putting down here might not happen. Priorities change, plans change, etc. but if this things is still going by year end I figure I’ll at least get a kick out of what I thought would happen versus reality. So without further adieu

INSIDE

  • Plank the nook walls, build a daybed
  • Build the boys’ headboards
  • Build a workbench for me
  • Build a workbench for the kids
  • Plank the entryway walls, add hooks and build a bench
  • Get a new dining room rug
  • Build the wall up in the basement to separate the spaces
  • Create some pantry cabinetry
  • (Re)Paint bathroom floor white using the right paint and poly this time
  • Build laundry station and laundry cabinet for the downstairs bathroom
  • Build a standing linen cabinet for the upstairs bathroom

Of all the projects I’m probably the most excited about the boys headboards. They are going to be a little bit of this:

Combined with a little bit of this:

Ana White reclaimed headboard

OUTSIDE

  • Make a walkway with something other than plywood (oh, it’s sad in mud season ’round here)
  • Build a shed
  • Replace the front lights with something that is brighter and a better size
  • Stain the porch (or more likely, have the porch stained, heh)
  • Trim the french doors outside the basement
  • Add lattice underneath the front porch
  • Build a playhouse for the kids, at least the platform, ladder, slide part.

That list is crazy pants. I am aware that 60% of that getting done would be an amazingly productive year, but those are all of the “I’d like to .. ” or “We should …” projects that Shannon and I have been talking about for way too long now. It will feel really good to knock of at least half of them, and who knows maybe I’ll be able to keep up my current streak of actually accomplishing things and get through this. Heh. Welcome 2013, let’s get it on.

The Bucket of Sadness

How did we get here? Well, let me tell ya.

The Bucket of Sadness

Back when I was hanging the beam I happened to need a measurement for something in the corner above. I went to balance myself on the counter and it was wet. That is never a good start in home improvement projects. A pantry should be dry. This one was not. It was not exactly rocket science to figure out the issue lies in the plumbing above the counters from the first floor bathroom. As I felt around and wiped some moisture off of the drain pipes I oddly found myself hoping it was from my 3 year old’s misadventures in potty training and not a leaking drain. I was really hoping I was wiping up pee I guess? Maybe I’m just so used to that by now it doesn’t phase me, but it still seems an odd thing to hope for.

All of that to say that I need to address the leaky pipe before I move on to the door.

I at least got a chance to hang the door on Saturday afternoon. It didn’t go well. Despite being a pre-hung door, I had all sorts of issues with level, plumb, clearance for the floor, twisting and my personal favorite half the jamb falling and splitting in the corner. Good times. But I got it up, popped off the door and called it a day.

I was determined to get the door primed at least this last weekend so after the kids were in bed I got out the primer and for some dumb reason a 4″ cabinet roller and a mini paint pan. After about 30 seconds of trying to use the paint roller on a 36″ door, I took another route. I dumped on primer and rolled with a normal wall roller. It was much faster and it all worked really well. I let one side dry while I painted primer on to the jamb with a brush and then came back to do the other side. I was adamant about not getting another paint try dirty (I’m not sure why) so I attempted my pour method again.

Artsy paint pour

This time it didn’t quite go so well, I was a little too generous with the pour. I ended up priming a bit of the basement walls that had gotten marked up and stained, particularly in the stair well so it all worked out fine in the end.

So the door, the molding and the jamb are all primed. I hope to get it constructed, painted and hung this weekend. Getting the threshold and trim done would be amazing, but I don’t know how realistic that is.

Basement Pantry :: The List

It’s in the name of the blog and it was kind of my intention to post the list of things that need to be done in a project and update each one as they get done or get posted about. I have no idea if this is going to annoy me, but it’s worth a shot. So here is the big ol’ list for the basement pantry project.

  • Clean out boxes and clutter from the pantry room
  • Donate anything useful to Goodwill, chuck all the junk
  • Take off all the doors and hardware from the existing cabinets and sand them down
  • Paint the cabinets and the walls
  • Set the cabinets and find a countertop solution for cheap and install it
  • Install a floor
  • Install a door and trim it out
  • Add fake beam with lights and faux timber frame details on opposite wall
  • Build tall upper cabinets
  • Build glass doors for upper cabinets
  • Install drop ceiling
  • Baseboard trim
  • Build lower cabinets for door wall
  • Build upper cabinet cubby / general store style storage for the door side wall.

That’s about it for now.